
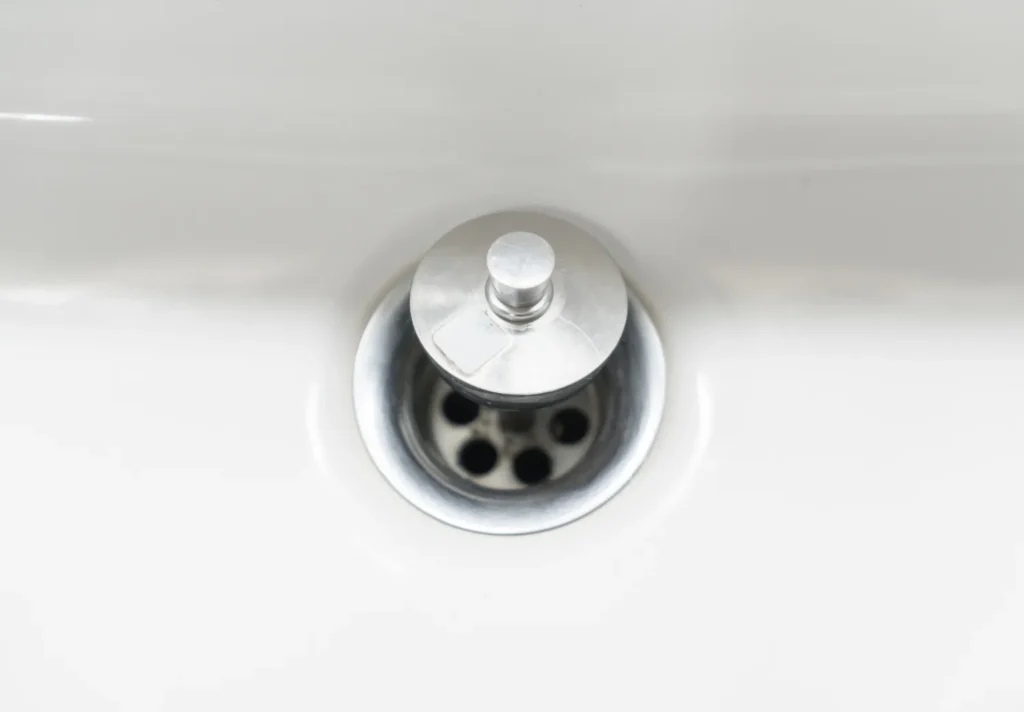
How to remove sink stopper is one of the most common DIY questions homeowners ask, and the answer is simpler than most people expect. Most sink stoppers come out in under ten minutes with basic tools, and some need no tools at all. The trick is to identify your stopper type first, because each type releases in a different way.
This guide shows you exactly how to remove a sink stopper, step by step. You will learn how to spot your stopper type, which tools to gather, and how to avoid the mistakes that cause leaks and broken parts. By the end, you will also know how to clean and reinstall the stopper like a pro.
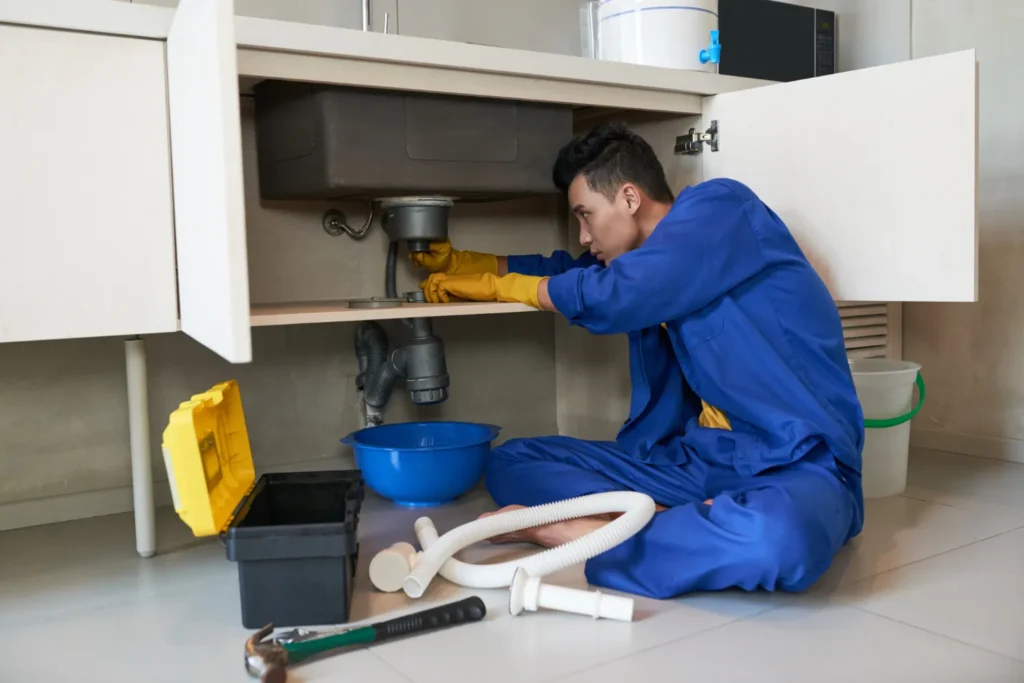
How to Remove Sink Stopper in 4 Steps
If you want the short version, here it is.
- Identify the stopper type. Look at the top. Is it a plain plug, a push-down cap, or a stopper with a lift rod behind the faucet?
- Try the easy release first. Twist the stopper counterclockwise and pull it straight up.
- If it will not budge, check underneath. Many stoppers connect to a pivot rod behind the drain pipe. Unscrew the retaining nut and slide the rod out.
- Lift the stopper out. Wiggle it gently, then pull it up and clean it.
That works for most sinks. However, a few stopper designs use set screws or threaded caps instead. Keep reading to find the exact method for your sink.
Key Takeaways
- The best way to remove a sink stopper depends on its type: lift-and-turn, pivot-rod pop-up, push-and-seal, or drop-in.
- Most stoppers need only a bucket, an old towel, and adjustable pliers.
- Never force a stuck stopper. Forcing it can crack the drain flange or strip the retaining nut.
- Removing the stopper once or twice a year prevents slow drains and bad smells.
- Always take a photo before you disassemble anything, because it makes reinstalling much easier.
Why You Might Need to Remove a Sink Stopper
Before you grab your tools, it helps to know why you are doing this job. People usually remove a sink stopper for one of five reasons.
- A slow or clogged drain. Hair and soap scum collect on the stopper and on the pivot rod beneath it.
- A bad smell. Trapped gunk grows bacteria, and bacteria create a musty odor.
- A stopper that will not hold water. Worn seals or a bent rod let water drain away.
- A broken or stuck stopper. Corrosion and mineral buildup can lock it in place.
- Replacement or an upgrade. Maybe you want a new finish, or you are installing a new faucet.
Whatever your reason, the process is nearly the same. In fact, knowing how to remove a sink stopper is a core home maintenance skill. If you enjoy fixing things yourself, you may also like our guide to essential home repair tools every beginner should own.
Tools and Materials You Need
You do not need a full toolbox. Gather these items first so you do not have to stop halfway through.
| Item | Why You Need It |
|---|---|
| Adjustable pliers or channel locks | Loosens the retaining nut and grips stubborn stoppers |
| Small bucket or bowl | Catches water and debris under the sink |
| Old towels or rags | Protects the cabinet and wipes up spills |
| Flashlight or phone light | Helps you see behind the drain pipe |
| Rubber gloves | Keeps your hands clean from slime and grime |
| Allen wrench set (hex keys) | Needed for stoppers with a set screw |
| Old toothbrush | Scrubs the stopper clean |
| White vinegar and dish soap | Dissolves buildup and soap scum |
| Plumber’s tape (optional) | Helps seal threaded parts when reassembling |
If you plan to clear a clog while you are at it, a small drain snake or a plastic drain-cleaning tool also helps. You can find all of these items at your local hardware store or at big retailers like The Home Depot and Lowe’s.
Step 1: Identify Your Sink Stopper Type
This step matters more than any other. If you pick the wrong method, you may break something. So take a minute to look closely at your sink.
The Four Most Common Sink Stopper Types
1. Pop-up stopper with a pivot rod. This is the most common bathroom sink stopper. A lift rod sits behind the faucet. When you pull it up, the stopper closes the drain. A horizontal pivot rod connects the two under the sink.
2. Lift-and-turn stopper. The stopper has a small knob on top. You turn it to lock it open or closed. There is no lift rod behind the faucet.
3. Push-and-seal (click-clack) stopper. You press the cap down once to close the drain, and press again to open it. These are popular on bathroom vanities and vessel sinks.
4. Drop-in stopper. This is a simple rubber or metal plug that sits in the drain. Kitchen sinks and utility sinks often use it.
A Quick Test to Tell Them Apart
Look behind the faucet. If you see a small vertical rod with a knob on top, you have a pop-up stopper with a pivot rod. If you see nothing, check the top of the stopper itself. A cap you can press down is a push-and-seal stopper. A plain plug that you lift out is a drop-in stopper. A stopper with a twisting knob is a lift-and-turn design.
Once you know the type, jump to the matching method below.
Method 1: How to Remove a Pop-Up Sink Stopper With a Pivot Rod
This is the method most people need. It works on the classic bathroom sink with a lift rod behind the faucet.
What You Will Need
Pliers, a bucket, a towel, and a flashlight.
Step-by-Step Instructions
Step 1: Clear the space under the sink. Remove everything from the cabinet. Then place a towel on the floor and put the bucket directly under the drain pipe.
Step 2: Locate the pivot rod. Use your flashlight to look at the drain pipe, often called the tailpiece. You will see a horizontal rod that enters the pipe through a round nut. That nut is the retaining nut.
Step 3: Look at the clevis strap. The pivot rod connects to a thin metal strip with many small holes. This strip is the clevis strap. It links the pivot rod to the vertical lift rod. Squeeze the spring clip that holds the strap, and slide the strap off the pivot rod. Take a photo first so you remember where it attached.
Step 4: Unscrew the retaining nut. Turn the nut counterclockwise by hand. If it is stuck, use pliers, but turn gently. A small amount of water may drip out, which is normal. The bucket will catch it.
Step 5: Pull out the pivot rod. Slide the rod out of the drain pipe slowly. The ball on the end of the rod sits inside a hole in the stopper. When the rod is free, the stopper is free too.
Step 6: Lift out the stopper. Reach into the sink and pull the stopper straight up. If it sticks, wiggle it left and right. It should come out easily now.
That is the full process for how to remove a pop-up sink stopper. Most people finish in five to ten minutes.
Pro Tip
Before you pull the rod out, notice which direction the stopper’s small hole faces. It must face the back of the sink when you reinstall it. Otherwise, the rod will not connect properly.
Method 2: How to Remove a Lift-and-Turn Sink Stopper
Lift-and-turn stoppers are the easiest type to remove. They usually take less than a minute.
Step-by-Step Instructions
Step 1: Turn the stopper to the open position. Rotate the knob until the stopper rises slightly.
Step 2: Twist the stopper counterclockwise. Hold the top of the stopper and turn it to the left. Many designs unscrew from a center post below.
Step 3: Lift it out. Once it releases, pull the stopper straight up.
Step 4: Check for a set screw. If the stopper will not turn, look for a tiny screw on the side of the knob. Use an Allen wrench to loosen it, then try again.
If you still cannot turn it, soak the stopper with warm vinegar for fifteen minutes. Mineral buildup is often the culprit. For a bigger cleaning project, see our guide to natural cleaning solutions that actually work around the house.
Method 3: How to Remove a Push-and-Seal (Click-Clack) Stopper
Push-and-seal stoppers look sleek, but they confuse many people. The good news is that the removal method is straightforward once you know the trick.
Step-by-Step Instructions
Step 1: Put the stopper in the open (up) position. Press the cap until it clicks and rises.
Step 2: Unscrew the cap. Grip the cap and turn it counterclockwise. In most cases the cap comes off and exposes a threaded post.
Step 3: Unscrew the center post or body. Look inside the drain. You will often see a threaded rod or body. Turn it counterclockwise with pliers or a screwdriver, depending on the design.
Step 4: Lift the assembly out. Pull the pieces up and set them on a towel. Keep them in order so you can reinstall them correctly.
Step 5: Check the drain flange. Some push-and-seal drains are attached to the sink with a locknut underneath. You do not need to remove that nut just to clean the stopper, so leave it alone unless you are replacing the whole drain.
Brands differ slightly, so check the manufacturer’s instructions if your cap does not unscrew. Companies such as Moen, Delta Faucet, and Kohler publish support pages and installation guides for their drain assemblies.
Method 4: How to Remove a Drop-In Sink Stopper
This is the simplest type. It has no rod, no screw, and no cap.
Step-by-Step Instructions
- Grip the top of the stopper.
- Pull it straight up.
- If it is stuck, run hot water around the edges for a minute to loosen the seal.
- Wiggle the stopper gently and lift it out.
If the stopper is rubber, it may stick because of suction or old soap residue. Use a butter knife around the rim to break the seal. Be careful not to scratch the sink.
Method 5: How to Remove a Stuck Sink Stopper
Sometimes a stopper refuses to come out, even after you use the right method. Do not panic. Here are the safest ways to free it.
1. Use Heat and Vinegar
Pour a cup of hot (not boiling) white vinegar around the stopper. Wait fifteen to twenty minutes. Vinegar dissolves mineral deposits and soap scum that glue the stopper in place.
2. Try Penetrating Oil on Metal Parts
Spray a small amount of penetrating oil on the retaining nut under the sink. Let it sit for ten minutes. Then try turning the nut again.
3. Add a Little Leverage
Wrap a rag around the stopper to protect the finish. Next, grip it with pliers and turn it counterclockwise while you pull up. Use steady pressure and avoid sudden jerks.
4. Check for Hidden Screws
Some stoppers hold on with a tiny set screw under the cap or on the side. Look closely. A single hidden screw is the most common reason a stopper will not come loose.
5. Know When to Stop
If the stopper is corroded or the nut is badly stripped, call a plumber. A small repair bill costs less than a cracked sink or a flooded cabinet. If you are unsure about plumbing jobs in general, our article on when to DIY and when to call a pro can help you decide.
How to Remove a Kitchen Sink Stopper
Kitchen sinks work a bit differently. Most use one of three setups.
- A basket strainer with a removable stopper. The stopper sits inside the strainer basket. Simply lift it out.
- A lift-and-turn basket strainer. Twist the stopper counterclockwise and pull up, just like a bathroom lift-and-turn stopper.
- A garbage disposal flange. Many disposal stoppers are plain, flat plugs that pull straight out. Never reach into a disposal that could be switched on. Turn off the power at the breaker or unplug the unit first.
Safety matters here. Because kitchen drains connect to disposals, always disconnect the power before you put your hand near the drain.
How to Remove a Bathtub Stopper (Bonus)
Since many people searching for how to remove a sink stopper also have a tub with the same problem, here is a quick overview.
- Toe-touch stoppers: Unscrew the cap by turning it counterclockwise, then remove the screw underneath.
- Lift-and-turn tub stoppers: Loosen the small set screw with an Allen wrench, then unscrew the stopper.
- Trip-lever drains: Unscrew the overflow plate and pull out the linkage and plunger.
These steps differ from sink stoppers, so check your drain style carefully before you start.
How to Clean a Sink Stopper After Removal
Once the stopper is out, do not skip the cleaning. This is the best part of the job, because it fixes most slow-drain and odor problems right away.
Step-by-Step Cleaning Guide
Step 1: Remove visible gunk. Wear gloves and pull off any hair or slime. Throw it in the trash, not down the drain.
Step 2: Soak the stopper. Fill a bowl with equal parts hot water and white vinegar. Soak the stopper for twenty to thirty minutes.
Step 3: Scrub it clean. Use an old toothbrush and a little dish soap. Pay attention to the seal, the hole, and any grooves.
Step 4: Clean the pivot rod. The rod collects a sticky layer of soap scum. Wipe it with a rag and rinse it well.
Step 5: Clean the drain opening. Shine your flashlight down the drain. Use a plastic drain tool or a bent wire to pull out any visible clump of hair.
Step 6: Flush with hot water. Run hot water for a minute to wash away loose debris.
Regular cleaning protects your plumbing. According to the U.S. Environmental Protection Agency’s WaterSense program, fixing small household leaks and drips also helps save water, which makes this maintenance task worth the effort.
How to Reinstall a Sink Stopper
Putting the stopper back is just removal in reverse. Follow these steps to do it correctly.
For a Pop-Up Stopper With a Pivot Rod
Step 1: Drop the stopper into the drain. Make sure the small hole near the bottom faces the back of the sink.
Step 2: Insert the pivot rod. Slide the rod, ball end first, through the retaining nut hole and into the stopper’s hole.
Step 3: Tighten the retaining nut. Turn it clockwise by hand. Then give it a gentle quarter turn with pliers. Do not overtighten, because you can crack the plastic.
Step 4: Reattach the clevis strap. Connect the strap to the pivot rod and adjust it until the stopper opens and closes properly.
Step 5: Test the stopper. Fill the sink with water and check for leaks under the drain. Then pull the lift rod and confirm that the stopper holds water.
For Other Stopper Types
Simply screw the parts back on in the same order you removed them. Hand-tighten first. Then add a small turn with pliers if needed.
Common Mistakes to Avoid
Even a simple job has traps. Avoid these common errors and you will save time and money.
- Using too much force. Brute strength cracks flanges and strips nuts.
- Turning the wrong way. Remember “lefty loosey, righty tighty.”
- Losing small parts. Place every nut, washer, and clip on a towel so nothing rolls down the drain.
- Ignoring the rubber gasket. A worn gasket causes leaks. Replace it if it looks cracked or flat.
- Overtightening on reassembly. Plastic nuts crack easily.
- Pouring harsh chemicals down the drain. Strong drain cleaners can damage pipes and finishes. Use vinegar and hot water first.
- Skipping the leak test. Always test the sink with water before you close the cabinet.
How Often Should You Remove and Clean Your Sink Stopper?
For a busy bathroom sink, clean the stopper every three to six months. Households with long hair or heavy product use may need to clean more often, perhaps every two months. Kitchen sinks can go six months between cleanings, unless you notice slow drainage.
A good rule is simple: if the water drains slowly or the sink smells, it is time to remove and clean the stopper.
Troubleshooting: What If Something Goes Wrong?
Let us look at the most common problems and how to fix them.
The Stopper Will Not Come Out
Check for a hidden set screw, soak the stopper in warm vinegar, and loosen the retaining nut with penetrating oil. If nothing works, a plumber can remove it safely.
The Retaining Nut Is Stripped
Try a pair of locking pliers for a better grip. If the nut is badly damaged, replace it. A new nut and rod set costs only a few dollars at any hardware store.
Water Leaks Under the Sink After Reinstalling
First, make sure the retaining nut is snug. Then check the rubber washer and replace it if it looks worn. Finally, confirm that the pivot rod sits straight in the drain pipe.
The Stopper Will Not Hold Water
Adjust the clevis strap by moving the pivot rod to a higher or lower hole. Also check for a worn stopper seal. A cracked seal needs replacement.
The Stopper Falls Down the Drain
This happens when the stopper is not attached to the pivot rod. Use a flashlight and a long pair of tweezers or needle-nose pliers to retrieve it. Alternatively, remove the P-trap under the sink, with a bucket underneath, and the stopper should drop out.
When to Replace Your Sink Stopper Instead
Cleaning solves most problems. Still, sometimes replacement is the smarter choice. Consider a new stopper if:
- The seal is cracked, flattened, or missing.
- The metal is pitted or corroded.
- The finish is peeling.
- The stopper no longer holds water, even after adjustment.
- You are updating your bathroom style.
Replacement stoppers are cheap. Most cost between five and fifteen dollars. When you shop, match the brand and finish to your faucet. Take the old stopper with you to the store to compare sizes. For ideas on upgrading your bathroom on a budget, read our post on affordable bathroom upgrades that add instant value.
Safety Tips Before You Start
A few precautions will keep the job safe and clean.
- Wear gloves. Drains contain bacteria and chemical residue.
- Never mix cleaners. Combining bleach and vinegar can create dangerous fumes. The Centers for Disease Control and Prevention offers guidance on safe cleaning and disinfection.
- Turn off power to a garbage disposal. This applies to kitchen sinks.
- Work in good light. A flashlight helps you avoid mistakes.
- Keep small parts together. Use a bowl to hold nuts, washers, and clips.
Smart Home and Tech Tips for Easier Maintenance
At Find Tech Home, we love simple tech that makes home care easier. Here are a few ideas that pair well with this project.
- Use your phone as a camera guide. Take photos or a short video before you disassemble. This single habit prevents most reassembly errors.
- Try a flexible LED inspection light. A small magnetic work light frees both hands under the sink.
- Set a recurring reminder. Add a calendar alert every three months to clean your drains.
- Add a water leak sensor. A small sensor under the sink can alert your phone if a slow leak starts. Learn more in our guide to the best smart home gadgets for beginners.
About Removing a Sink Stopper
How do I remove a sink stopper that has no screw?
Most screwless stoppers release when you twist them counterclockwise and pull up. If that fails, look underneath the sink for a pivot rod and retaining nut. Loosen the nut, pull the rod, and the stopper will lift out.
Which way do you turn a sink stopper to remove it?
Turn it counterclockwise (to the left). That direction loosens almost every threaded stopper and cap.
Do you need a plumber to remove a sink stopper?
No. Most homeowners can remove a sink stopper in under ten minutes with pliers and a bucket. You only need a plumber if parts are corroded, stripped, or leaking after reassembly.
How do I remove a pop-up drain stopper without tools?
Some pop-up stoppers lift out by hand. Try twisting the stopper counterclockwise and pulling up. If the stopper is attached to a pivot rod, you will need pliers to loosen the nut underneath.
How do I remove a bathroom sink stopper that is stuck?
Soak it in hot vinegar for fifteen to twenty minutes, then try twisting gently. Check for hidden set screws and apply penetrating oil to the retaining nut. Avoid force.
Why is my sink stopper not coming out?
The usual causes are mineral buildup, a hidden set screw, a connected pivot rod, or a corroded retaining nut. Identify your stopper type and follow the matching method above.
How do I take out a push-down (click-clack) sink stopper?
Press the cap to the open position, unscrew it counterclockwise, and then unscrew the center post or body. Lift the pieces out together.
Can I remove a sink stopper while the sink has water in it?
It is better to drain the sink first. If water is trapped, bail it out with a cup. This keeps your cabinet dry and gives you a clear view of the drain.
How do I remove a kitchen sink stopper?
Most kitchen stoppers simply pull straight up or twist counterclockwise and lift out. If you have a garbage disposal, turn off the power first.
How often should I clean my sink stopper?
Clean it every three to six months. Clean it sooner if the sink drains slowly or smells bad.
Learning how to remove a sink stopper saves you time, money, and frustration. Once you identify your stopper type, the job becomes easy. Twist and lift for simple designs. Loosen the retaining nut for pivot-rod stoppers. Unscrew the cap for push-and-seal models. And when a stopper is stuck, use vinegar and patience instead of force.
Remember these three rules:
- Identify first. The right method depends on your stopper type.
- Go slow. Gentle pressure protects your sink and your plumbing.
- Clean regularly. A clean stopper means a fast drain and a fresh-smelling bathroom.
Now it is your turn. Grab your pliers, a bucket, and a flashlight, and try the method that matches your sink. Have a question we did not cover? Leave a comment below, and our team will help you out. And if you want more practical home guides like this one, browse the rest of Find Tech Home for simple, tested tips that make home life easier.