

To check the PC specs on Windows 11 or 10, press Windows + I, go to System > About, and read your processor, installed RAM, and system type. For deeper details, press Windows + R, type msinfo32, and press Enter. On a Mac, click the Apple menu > About This Mac.
Knowing how to check the PC specs is one of the most useful basic computer skills. You need it before you buy software, install a game, upgrade your memory, or ask a technician for help. The good news is that it takes less than a minute.
In this guide, you will learn eight proven ways to find your computer’s specifications. We cover Windows 11, Windows 10, macOS, and Linux. You will also learn what each spec means, how to compare your PC with game or software requirements, and which free tools give the most detail.
In this guide: Quick steps · What PC specs are · Windows methods · Mac methods · Linux methods · Free tools · Reading the results · Mistakes to avoid · FAQ

What Are PC Specs and Why Should You Check Them?
PC specs (short for specifications) describe the hardware and basic software of your computer. They tell you how powerful your machine is and what it can run.
Most people want to know their specs for a few simple reasons:
- Gaming: Every game lists minimum and recommended requirements.
- Software installs: Video editors, design tools, and AI apps need enough RAM and a capable graphics card.
- Upgrades: You cannot buy compatible RAM or storage without knowing what you have.
- Selling or buying: A listing is only trustworthy when the specs match.
- Troubleshooting: Support teams almost always ask for your Windows version, CPU, and RAM first.
- Security and updates: Some updates, such as Windows 11, need specific hardware features.
If you have ever wondered why a program runs slowly, your specs often hold the answer. Learning how to check the PC specs helps you stop guessing and start fixing.
The Main PC Specs Explained in Plain English
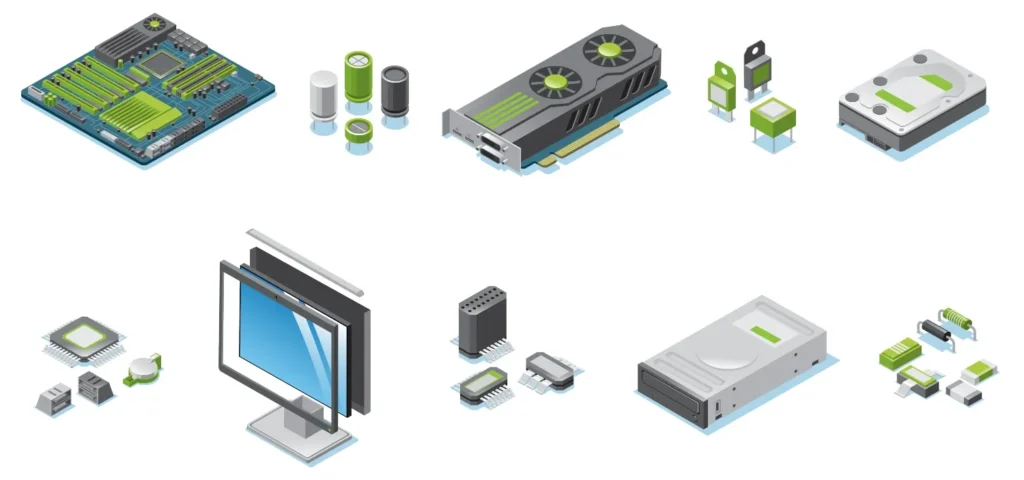
Before you open any tool, it helps to know what you are looking for. Here are the key specs and what they mean.
Processor (CPU)
The CPU is the brain of your computer. It handles instructions from every program. You will see a name such as Intel Core i5-12400 or AMD Ryzen 5 5600. Look at the model number, the number of cores, and the speed in GHz.
Memory (RAM)
RAM is short-term memory. It holds the apps and files you are using right now. More RAM lets you run more programs at once. Most modern PCs need at least 8 GB, and 16 GB is a comfortable level for gaming and multitasking.
Graphics Card (GPU)
The GPU draws images on your screen. It matters most for games, video editing, 3D work, and AI tasks. Some PCs use integrated graphics built into the CPU. Others have a dedicated graphics card from NVIDIA or AMD with its own video memory (VRAM).
Storage (SSD or HDD)
Storage keeps your files, apps, and Windows itself. An SSD is much faster than an older hard disk drive (HDD). Check both the total size and the type.
Motherboard
The motherboard connects every part. Knowing its model matters when you want to upgrade your CPU or RAM.
Operating System (OS)
This is the software that runs your computer, such as Windows 11, Windows 10, macOS, or Linux. Also check the version and whether it is 64-bit or 32-bit.
Display
Screen size, resolution (for example 1920 x 1080), and refresh rate matter for gamers and creators.
How to Check the PC Specs on Windows 11 and Windows 10 (6 Methods)
Windows gives you several built-in ways to view your specs. You do not need to install anything. Start with Method 1 if you only need the basics.
Method 1: Use the Settings App (Fastest Way)
This is the easiest answer to how to check the PC specs for most people.
- Press Windows + I to open Settings.
- Click System.
- Scroll to the bottom and click About.
- Look under Device specifications.
You will see your device name, processor, installed RAM, system type (64-bit or 32-bit), and more. Under Windows specifications, you can see your edition, version, and OS build.
Tip: Click the Copy button to copy these details. You can then paste them into an email or a support chat.
Method 2: Use System Information (msinfo32)
System Information is the most complete built-in report. It shows hardware, drivers, and system resources in one place.
- Press Windows + R to open the Run box.
- Type msinfo32 and press Enter.
- Read the System Summary page.
Here you can find the BIOS version, motherboard model (called BaseBoard Product), total physical memory, and processor details. To see your graphics card, expand Components > Display on the left.
You can also export the full report. Click File > Export and save it as a text file. This is very helpful when you need to send your specs to a technician.
Method 3: Use Task Manager
Task Manager shows live performance data, so it is great for checking specs while your PC is busy.
- Press Ctrl + Shift + Esc to open Task Manager.
- Click the Performance tab. If you only see a small window, click More details first.
- Select CPU, Memory, Disk, or GPU from the left panel.
Each page shows the model name and key numbers. For example, the Memory page shows total RAM, speed (MHz), slots used, and form factor. The CPU page shows cores, logical processors, and base speed. The GPU page shows video memory and driver version.
This method is especially useful for upgrades, because it tells you how many RAM slots are free.
Method 4: Use the DirectX Diagnostic Tool (dxdiag)
DxDiag is popular with gamers because it clearly shows graphics and DirectX details.
- Press Windows + R.
- Type dxdiag and press Enter.
- If a window asks about checking drivers, click Yes or No.
- On the System tab, read the processor, memory, and DirectX version.
- Open the Display tab to see your graphics card name, VRAM, and driver version.
Click Save All Information to export the report as a text file.
Method 5: Use Command Prompt or PowerShell
Commands are quick when you want specific information or need to check a PC without clicking through menus.
Open Command Prompt: Press Windows + R, type cmd, and press Enter. Then type:
systeminfoThis prints your OS version, processor, BIOS version, total and available memory, and network adapters in one list.
Open PowerShell: Right-click the Start button and choose Terminal or Windows PowerShell. Then try these useful commands:
Get-CimInstance Win32_Processor | Select-Object Name, NumberOfCores, NumberOfLogicalProcessorsGet-CimInstance Win32_VideoController | Select-Object Name, AdapterRAM, DriverVersionGet-CimInstance Win32_PhysicalMemory | Select-Object Manufacturer, Capacity, SpeedGet-PhysicalDisk | Select-Object FriendlyName, MediaType, SizeNote: Older guides use the wmic command. Microsoft has been removing it from newer Windows 11 versions, so PowerShell commands are the safer choice today.
Method 6: Use Device Manager
Device Manager lists every component Windows detects. It is the best place to confirm your graphics card, network adapter, and drivers.
- Right-click the Start button.
- Click Device Manager.
- Expand Processors, Display adapters, Disk drives, or Network adapters.
- Double-click any device to see details and driver information.
A yellow warning icon means a driver problem. That is a quick clue when something is not working.
How to Check the PC Specs on a Mac
Apple makes this very simple. If you use a MacBook, iMac, or Mac mini, follow these steps.
Quick Method: About This Mac
- Click the Apple menu in the top-left corner.
- Select About This Mac.
- Review the chip (or processor), memory, startup disk, and macOS version.
Detailed Method: System Report
- Open About This Mac.
- Click More Info, then scroll down and select System Report. On some versions, hold the Option key and choose System Information from the Apple menu.
- Expand Hardware, Graphics/Displays, Storage, and Memory in the sidebar.
Terminal Method
Open Terminal and run:
system_profiler SPHardwareDataTypeThis prints your model name, chip, memory, serial number, and more. Apple also explains how to identify your Mac model on its official Apple Support website, which is helpful when you need an exact model for repairs or trade-ins.
How to Check the PC Specs on Linux
Linux users can find specs in the Settings app or by using the terminal. The terminal is faster and works on almost every distribution.
Open a terminal and try these commands:
| What you want to see | Command |
|---|---|
| CPU details | lscpu |
| Memory usage and total RAM | free -h |
| Storage and partitions | lsblk |
| Graphics card | lspci | grep -i vga |
| OS and kernel info | hostnamectl |
| Full hardware list | sudo lshw -short |
| Complete summary (if installed) | inxi -Fz |
If a command is missing, install it with your package manager. For example, on Ubuntu you can run sudo apt install inxi.
Best Free Tools to Check PC Specs (Beyond Built-In Options)
Built-in tools are enough for most people. However, third-party tools can show extra details, such as exact RAM timings, temperatures, and motherboard sensors.
CPU-Z
CPU-Z is a lightweight and trusted app that shows your CPU, motherboard, RAM, and cache in detail. You can download it from the official CPU-Z page at CPUID. It is a favorite among overclockers and PC builders.
GPU-Z
GPU-Z focuses on your graphics card. It shows the exact GPU model, memory type, clock speeds, and sensor readings. Get it from the TechPowerUp GPU-Z page.
Speccy
Speccy gives a simple, clean summary of every major component on one screen, including temperatures. You can learn more on the Speccy page by CCleaner.
HWiNFO
HWiNFO is an advanced tool for people who want live sensor data and a full hardware inventory. It is available at the official HWiNFO website. Use it when you need very precise details.
Which Tool Should You Use?
- Beginner: Windows Settings or Speccy.
- Gamer: DxDiag, GPU-Z, and Task Manager.
- PC builder or upgrader: CPU-Z and HWiNFO.
- Technician or support: msinfo32 export and HWiNFO report.
Safety tip: Always download tools from the official developer website. Fake download sites often bundle unwanted software.
Quick Comparison: Which Method Is Best?
| Method | Best for | Skill level | Time needed |
|---|---|---|---|
| Settings > About | Basic specs (CPU, RAM, OS) | Beginner | 10 seconds |
| System Information (msinfo32) | Full report and export | Beginner | 1 minute |
| Task Manager | RAM slots, live usage, GPU | Beginner | 30 seconds |
| DxDiag | Gaming and DirectX details | Beginner | 1 minute |
| Command Prompt / PowerShell | Exact data and scripts | Intermediate | 1 minute |
| Device Manager | Drivers and devices | Beginner | 1 minute |
| CPU-Z / GPU-Z / HWiNFO | Deep hardware details | Intermediate | 2 minutes |
How to Check Your Laptop Specs Without Opening Windows
Sometimes your laptop will not boot, or you are inspecting a used one before buying. You still have options.
- Check the sticker: Most laptops have a label on the bottom with the model name and serial number. Search that model on the manufacturer’s website to see the full specs.
- Enter the BIOS or UEFI: Restart the PC and press the key shown on the first screen (often F2, Del, or Esc). The BIOS shows CPU, RAM, and storage.
- Use the original box or invoice: The box and receipt often list the full configuration.
- Look up the serial number: Brands such as Dell, HP, Lenovo, and ASUS let you enter a serial number to see the original build.
Keep in mind that the original specs may differ from the current ones if someone upgraded the machine.
How to Compare Your PC Specs With Game or Software Requirements
Checking your specs is only half the job. The real value comes from comparing them with what an app needs.
Step 1: Write Down Your Key Specs
Note your CPU model, RAM amount, GPU model, free storage, and Windows version.
Step 2: Find the Requirements
Open the game’s store page or the software’s official website. Look for Minimum and Recommended requirements.
Step 3: Compare One Spec at a Time
- Minimum: The game should launch, but settings may be low.
- Recommended: You should get smooth play at higher settings.
- Below minimum: Expect crashes, lag, or errors.
Step 4: Use an Automatic Checker
Websites can scan your system and compare it for you. Popular options include Can You RUN It and the Windows 11 hardware requirements page on Microsoft’s website. These tools save time, but always double-check the results against the official requirements.
Step 5: Decide on an Upgrade
If one part falls short, an upgrade may be cheaper than a new PC. RAM and SSD upgrades are usually the easiest and most affordable. If your graphics card is the problem, check that your power supply and case can handle a new one. For help with upgrade choices, see our guide to upgrading your PC on a budget.
How to Understand Your PC Spec Results
Seeing a list of model numbers does not help unless you know what is good. Use these general guidelines as a starting point.
RAM Guide
- 4 GB: Only light web browsing and basic tasks.
- 8 GB: Everyday use and light multitasking.
- 16 GB: Gaming, programming, and creative work.
- 32 GB or more: Heavy video editing, 3D work, and virtual machines.
Storage Guide
- Prefer an SSD for the operating system. It speeds up boot time and app loading.
- Keep at least 15–20% of your drive free for smooth performance.
CPU Guide
- Newer generations are usually faster at the same tier.
- More cores help with multitasking, rendering, and streaming.
- Check the model number rather than only the brand name. For example, an Intel Core i5-12400 is much newer than an Intel Core i5-6500.
GPU Guide
- Integrated graphics work well for office work and video streaming.
- A dedicated GPU is recommended for modern games and creative software.
- More VRAM helps at higher resolutions.
If you want to see how your parts compare with others, benchmark sites such as UserBenchmark let you check performance rankings. Treat the results as one data point, not the final verdict.
Common Mistakes When You Check PC Specs
Even simple tasks have traps. Avoid these mistakes to get accurate information.
- Mixing up “installed RAM” and “usable RAM.” Usable RAM can be lower if integrated graphics share memory or if you run a 32-bit OS.
- Reading the wrong GPU. Laptops often have two GPUs. Task Manager may show both: an integrated one and a dedicated one.
- Ignoring the system type. A 32-bit OS cannot use more than about 4 GB of RAM.
- Trusting only the brand name. “Core i7” does not tell you the generation or speed. Always read the full model number.
- Using outdated guides. Some old commands, like
wmic, may not work on new versions of Windows. - Forgetting free storage. A large drive does not help if it is almost full.
- Downloading tools from random sites. Use only official sources.
Troubleshooting: What If You Cannot See Your Specs?
Sometimes the usual tools fail. Here are quick fixes.
- Settings will not open: Try msinfo32 or Task Manager instead.
- GPU shows as “Microsoft Basic Display Adapter”: Your graphics driver is missing. Install the latest driver from NVIDIA, AMD, or Intel, or use Windows Update.
- Commands return an error: Run PowerShell or Command Prompt as administrator.
- Information looks wrong: Restart the PC and check again. Also confirm that your BIOS is up to date.
- The PC will not start: Use the BIOS method or check the label on the device.
If you still have trouble, see our guide on fixing common Windows problems for more help.
Pro Tips for Keeping a Record of Your PC Specs
Make a habit of saving your specs. It takes two minutes and saves hours later.
- Export a msinfo32 report to a text file and store it in cloud storage.
- Take a screenshot of Settings > About after every major upgrade.
- Save the serial number and purchase date in a notes app.
- Keep driver download links bookmarked for your graphics card and motherboard.
When you want to learn more about maintaining your PC, read our PC maintenance checklist for regular care tips.
How do I check my PC specs quickly?
Press Windows + I, open System, and click About. You will see your processor, RAM, and system type in seconds. For more detail, run msinfo32 from the Run box.
How do I check the PC specs using a shortcut?
Press Windows + Pause/Break on many keyboards to open the About page directly. You can also press Windows + R, type msinfo32, and press Enter.
How do I check my graphics card?
Open Task Manager with Ctrl + Shift + Esc, click Performance, and select GPU. You can also run dxdiag and open the Display tab. For deeper detail, use GPU-Z.
How do I check how much RAM I have?
Go to Settings > System > About and read Installed RAM. To see the speed and number of slots used, open Task Manager > Performance > Memory.
How do I check my PC specs in CMD?
Open Command Prompt and type systeminfo, then press Enter. It lists your OS, processor, BIOS, and memory.
How can I check my laptop specs?
Use the same methods as a desktop: Settings > System > About, msinfo32, or Task Manager. If the laptop will not boot, check the bottom label or enter the BIOS.
How do I check my motherboard model?
Run msinfo32 and look for BaseBoard Manufacturer and BaseBoard Product. CPU-Z also shows this on its Mainboard tab.
Is it safe to use third-party tools to check specs?
Yes, if you download from the official developer site. Trusted tools such as CPU-Z, GPU-Z, and HWiNFO are widely used. Avoid unknown download portals.
How do I know if my PC can run Windows 11?
Use the PC Health Check app from Microsoft, or compare your CPU, RAM, storage, TPM, and Secure Boot status with the official Windows 11 requirements.
How often should I check my PC specs?
Check them before buying a game or software, after upgrades, and when you troubleshoot slowdowns. There is no need to check them daily.
Now You Know How to Check the PC Specs
Learning how to check the PC specs is simple, and it gives you control over your computer. For a fast answer, use Settings > System > About. For a complete report, use msinfo32. For gaming details, use dxdiag and Task Manager. For deeper analysis, try CPU-Z, GPU-Z, or HWiNFO.
Mac users can rely on About This Mac, and Linux users can use commands like lscpu and inxi. Save a copy of your specs, compare them with the requirements, and you will always know exactly what your machine can do.
Next step: Open your system information right now and write down your CPU, RAM, GPU, and storage. Then bookmark this guide so you can come back whenever you upgrade or troubleshoot.
Did this guide help? Share it with a friend who keeps asking about their computer, and explore more step-by-step tutorials on FindTechOme.